
The intention is to deploy a pair of high-availability pfSense VMs to handle the homelab routing along with configuring OSPF to take care of route propagation to my primary router. I don’t want to deal with static routes for a bunch of VLANs, or at least any that need outbound access, and my EdgeRouter supports OSPF.
This is going to be a 2 or 3 part series. There’s a lot of steps, and putting in all in 1 post would make a huge post.
Due to my home layout, my homelab is in a different room from my main workstation and my internet connection. It’s a condo, so not easy to run cable. Not to mention, my router doesn’t have 10Gb and I have 2x 10Gb switches in my homelab stack.
I want to move my homelab routing to take full advantage of that 10Gb goodness.
With that said, I decided to build a high-availability pair of pfSense virtual appliances in my VMware vSphere lab with a lot of learning on the way.
Initial installation is pretty basic. 100GB disk was probably way overkill, but with thin-provisioning it’s no big deal. I also wasn’t sure about CPU and memory, so that’s probably overkill as well.
For the guest OS, as of pfSense 2.4.5, you will want to select Other and FreeBSD 11 (64-bit.) pfSense 2.5.x uses the FreeBSD 12 kernel, but it is not yet released.
https://docs.netgate.com/pfsense/en/latest/releases/versions-of-pfsense-and-freebsd.html

As all of my hosts have both 1Gb and 10Gb, I opted to retain 1Gb for WAN and 10Gb for LAN. I kept network 1 on the VM Network of the standard vSwitch. Network 2 is a new trunked portgroup on my dvSwitch that uses the 10Gb for uplinks.

Now I want to keep these VMs running on different hosts, but I also want them to only reside on my Supermicro hosts.
This required creating VM/Host Groups and VM/Host Rules.
Host group to group together the Supermicro hosts and VM group to group together the VMs. VM rules to keep them running on different hosts, and host rule to keep them on just the 2 Supermicros.


Now we need to enable promiscuous mode on the dvSwitch portgroup and on the vSwitches if we want to build a high-availability pair.
https://docs.netgate.com/pfsense/en/latest/highavailability/troubleshooting-high-availability-clusters.html
For the dvSwitch, promiscuous mode is enabled on the portgroup. We do not need to worry about forged transmits.

For the standard vSwitch, it needs to be enabled on the vSwitch of each individual host.

Now console on to the pfSense VMs. At first, I was having some strange behavior. When I initially added both network adapters, after install pfSense only detected 1 of the network adapters.

Interestingly, going back in to the VM settings, sure enough it only had 1 network adapter.

Once we got that squared away, pfSense was now properly displaying both interfaces. We don’t want to configure VLANs at the moment, so we select N.

We select vmx0 for WAN and vmx1 for LAN. Check MAC addresses to validate you are assigning them properly. Y to proceed.

Now we are up and running and to the console menu.

Now, because this is a firewall it by default blocks web interface access at the WAN interface. Since this is in the lab, we want to enable it as our workstation is not currently residing behind it.
At the console menu, enter option 12: PHP shell + pfSense Tools
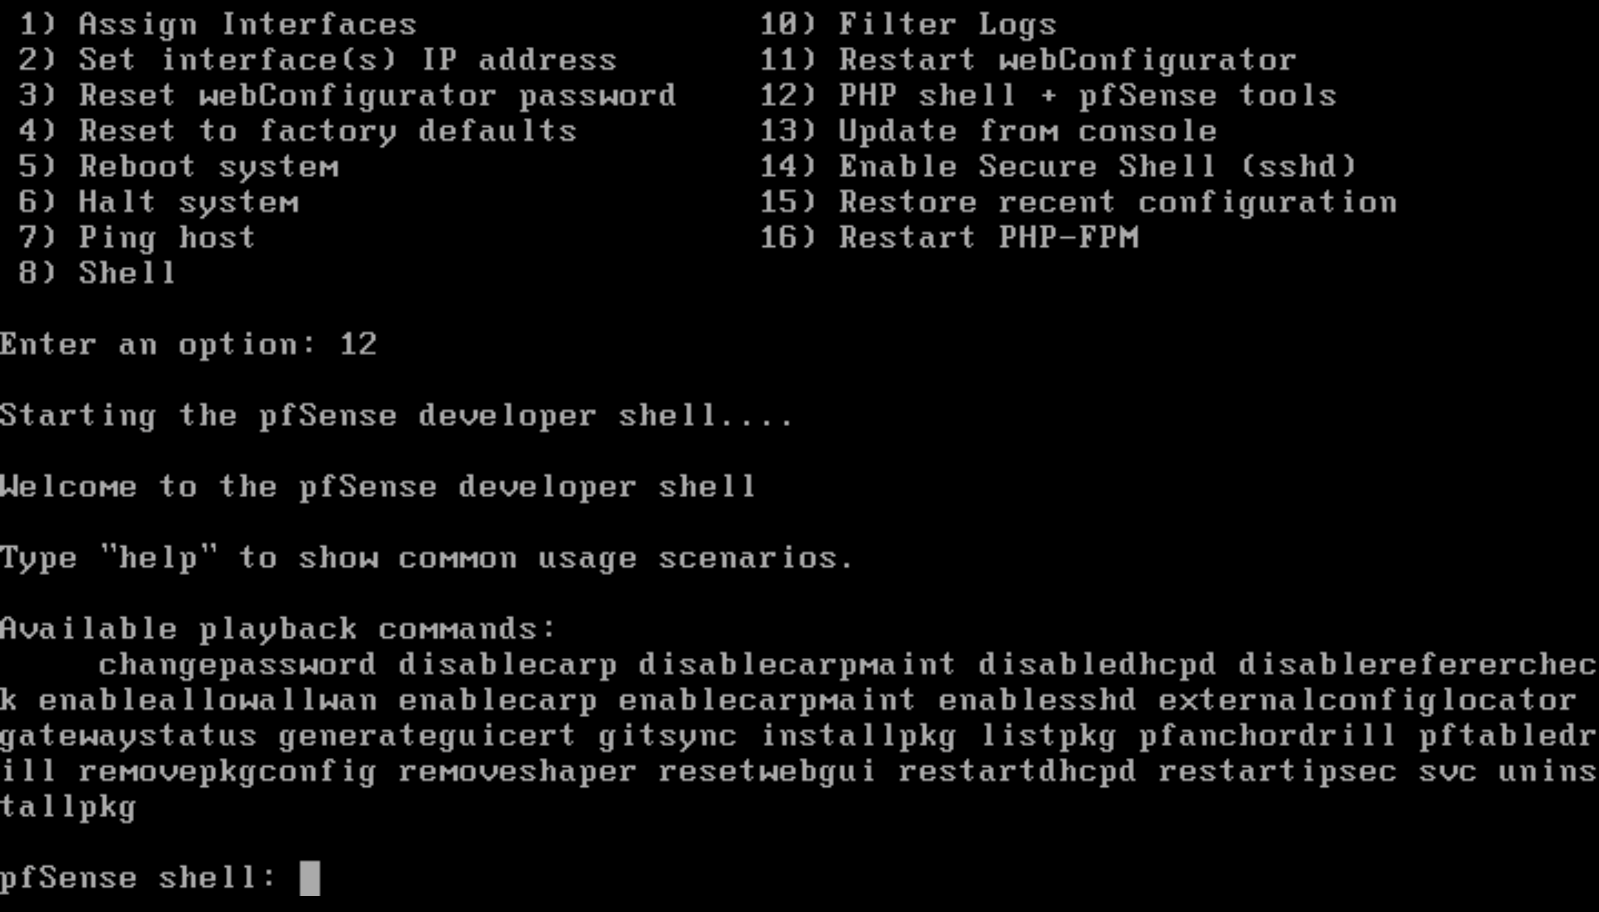
To enable WAN access, we need to enter:
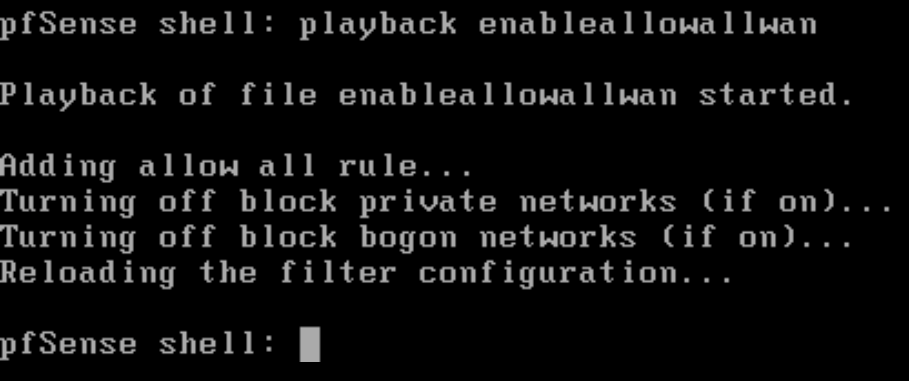
playback enableallowallwan
Then press enter.

It should show what actions it performed, then return to the shell prompt.
This creates a new allow any-any rule on the WAN interface.
At this point we should be able to log in to the pfSense web interface.
From there, we just want to run through general setup.
Configure the normal necessities; hostname, domain, dns.
As this is home use, I disregarded the warning about .local domains. Also, it’s not my fault Server 2016 Essentials still defaults to .local!
There are other things like timezone that you may want to configure as well.

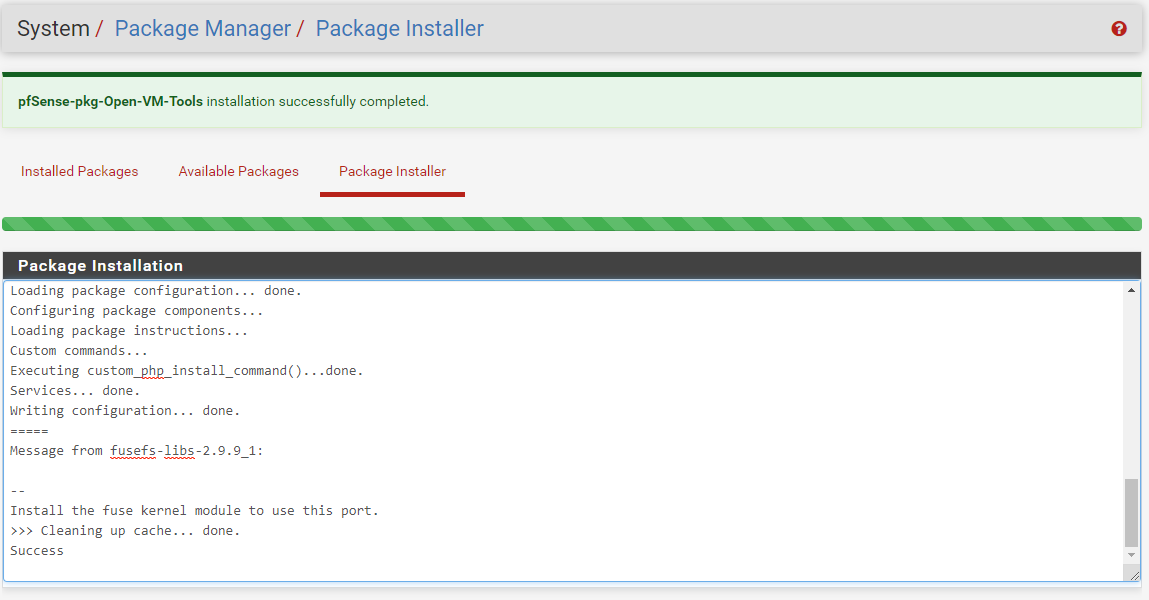
Now to install VMware tools; or, rather, Open-VM-Tools. Go to System then Package Manager.

Select Available Packages, search for vmware, then select Install for Open-VM-Tools.

It will report when install is completed.
Of course, repeat these steps on both pfSense VMs.
Now we will want to create a CARP interface; Common Address Redundancy Protocol. This is a virtual IP that is shared by both systems.
https://docs.netgate.com/pfsense/en/latest/highavailability/index.html
Go to Firewall then Virtual IPs.

Then click on Add.

For Type, select CARP. This one will be for the WAN interface, then use appropriate IP. Virtual IP password is used to authenticate the nodes with each other. Each CARP needs a unique VHID group ID, but since this is the first 1 is fine. The primary node we can leave skew at 0.
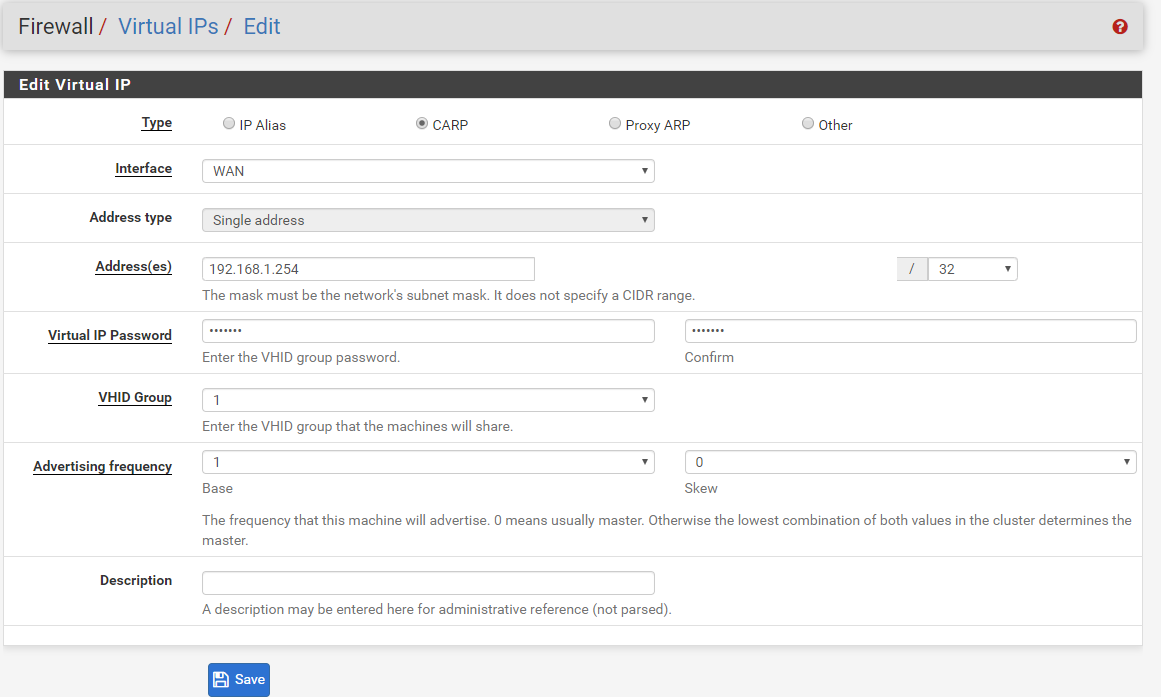
For the second node, we enter all the same info except we increment the skew by 1 as it will be the backup.

When we’re done, we save then click Apply Changes.

Now if we go to the Status menu then CARP (failover) we can validate that the primary is master and secondary is backup.


To setup the synchronization between the 2 VMs, there’s some additional work to do. It’s recommended to use a separate interface; but this is a lab, so a separate VLAN will do just fine as I wouldn’t expect that much traffic.
https://docs.netgate.com/pfsense/en/latest/highavailability/configuring-high-availability.html
So I added a new VLAN100 to both of my EdgeSwitch 16XG.

Back in pfSense, we need to add the VLAN interface then add the assignment.
Go to Interfaces then Assignments.

Then go to the VLANs section (disregard the VLAN100 I already created) and click Add.

We want this on the 10Gb, so parent interface will be LAN, VLAN Tag 100, and a description then Save.

Now we go back to Interface Assignments, and we should see a new Available network port with the new VLAN interface we just created. Click Add. (Again, disregard the already existing VLAN100.)

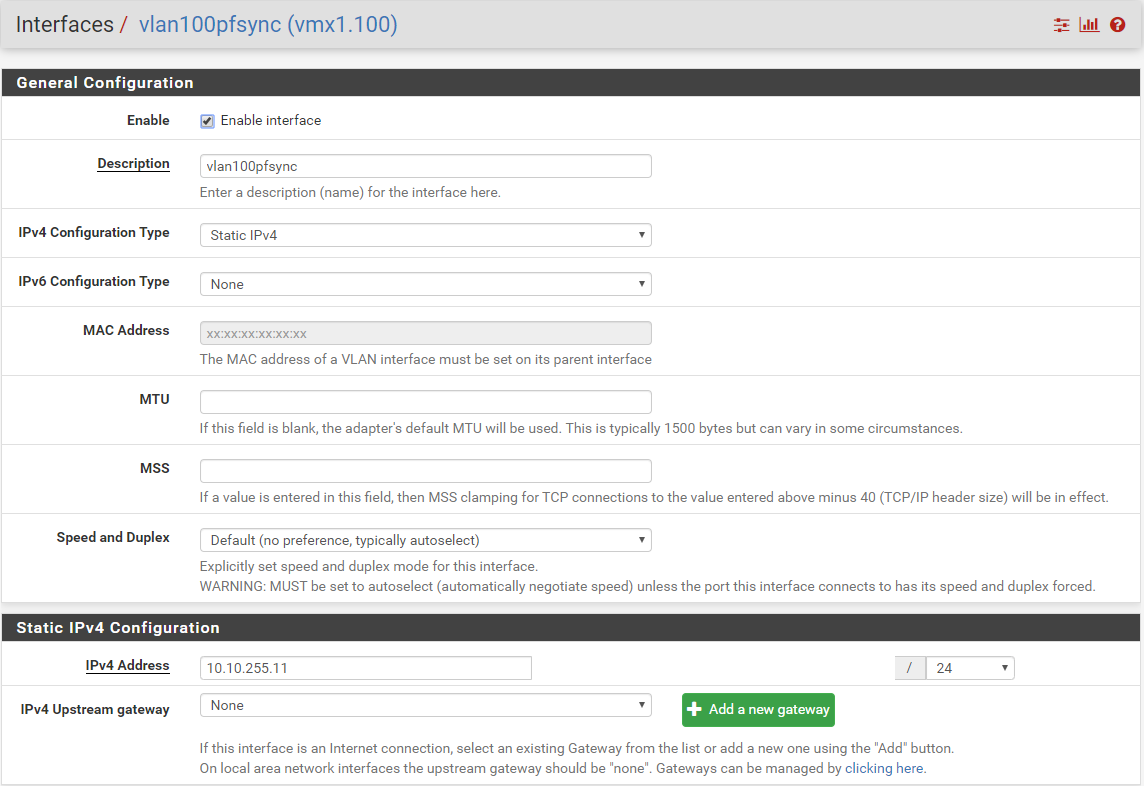
Interface name should now be listed as OPT#. Click on the name to bring up the settings.

Now we can rename it, configure a static IP, then configure the IP address. This isn’t routed, so we don’t need a gateway. A /24 network is more than necessary for 2 nodes, but I’m not already using this address space so no big deal.
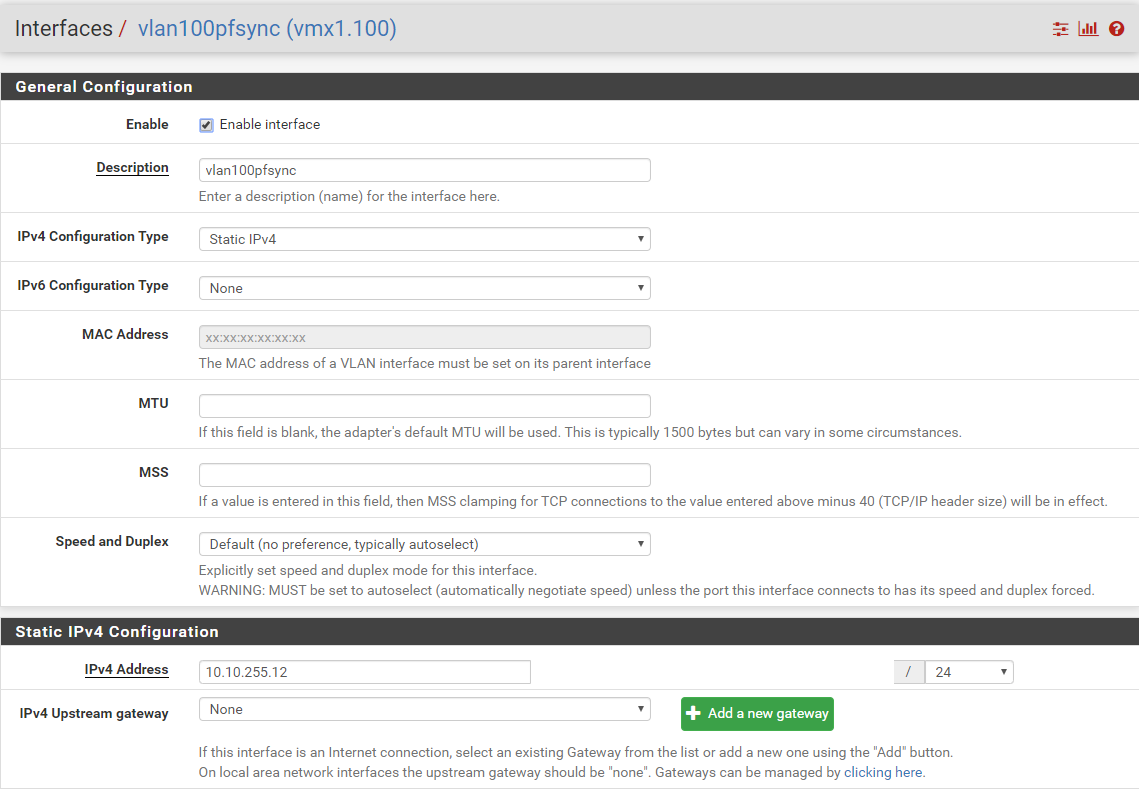
Duplicate this on the other pfSense VM, and of course providing a different IP address within the same subnet.
Now to configure the sync options. Go to System then High Avail. Sync.

On the primary, we need to enable sync states, select the new interface we created, and the IP address of the peer. We also need to configure the sync settings. Remote system username needs to be admin and password for that account, and that needs to be identical between all nodes.
https://docs.netgate.com/pfsense/en/latest/highavailability/configuring-high-availability.html

On the peer, we only configure the sync states items. We do not want to sync settings from the peer to the primary, so leave the IP blank. I’m not sure if the other items need selected or not; as long as the IP field is left blank.

At this point, we should be able to add firewall rules to pfSense-01, and those rules will then get synchronized on to pfSense-02.
Once we have validated that synchronization is working, we’re done with the high-availability deployment.
Up next will be configuring OSPF, adding new VLANs and validating the routes are getting propagated to my EdgeRouter.
One Reply to “High Availability pfSense in vSphere Part 1”